# ST7789 Driver for MicroPython
This driver is based on [devbis' st7789_mpy driver.](https://github.com/devbis/st7789_mpy)
I modified the original driver for one of my projects to add:
- Display Rotation.
- Scrolling
- Writing text using bitmaps converted from True Type fonts
- Drawing text using 8 and 16-bit wide bitmap fonts
- Drawing text using Hershey vector fonts
- Drawing JPGs, including a SLOW mode to draw jpg's larger than available ram
using the TJpgDec - Tiny JPEG Decompressor R0.01d. from
http://elm-chan.org/fsw/tjpgd/00index.html
- Drawing PNGs using the pngle library from https://github.com/kikuchan/pngle
- Drawing and rotating Polygons and filled Polygons.
- Tracking bounds
- Custom init capability to support st7735, ili9341, ili9342 and other displays. See the examples/configs folder for M5Stack Core, M5Stack Core2, T-DONGLE-S3 and Wio_Terminal devices.
Included are 12 bitmap fonts derived from classic pc text mode fonts, 26
Hershey vector fonts and several example programs for different devices.
## Display Configuration
Some displays may use a BGR color order or inverted colors. The `cfg_helper.py`
program can be used to determine the color order, inversion_mode, colstart, and
rowstart values needed for a display.
### Color Modes
You can test for the correct color order needed by a display by filling it with
the `st7789.RED` color and observing the actual color displayed.
- If the displayed color is RED, the settings are correct.
- If the displayed color is BLUE, `color_order` should be `st7789.BGR`.
- If the displayed color is YELLOW, `inversion_mode` should be `True.`
- If the displayed color is CYAN, `color_order` should be `st7789.BGR` and
`inversion_mode` should be `True.`
### colstart and rowstart
Some displays have a frame buffer memory larger than the physical display
matrix. In these cases, the driver must be configured with the position of the
first physical column and row pixels relative to the frame buffer. Each
rotation setting of the display may require different colstart and rowstart
values.
The driver automatically sets the `colstart` and `rowstart` values for common
135x240, 240x240, 170x320 and 240x320 displays. If the default values do not work for
your display, these values can be overridden using the `offsets` method. The
`offsets` method should be called after any `rotation` method calls.
#### 128x128 st7735 cfg_helper.py example
```
inversion_mode(False)
color_order = st7789.BGR
for rotation 0 use offset(2, 1)
for rotation 1 use offset(1, 2)
for rotation 2 use offset(2, 3)
for rotation 3 use offset(3, 2)
```
#### 128x160 st7735 cfg_helper.py example
```
inversion_mode(False)
color_order = st7789.RGB
for rotation 0 use offset(0, 0)
for rotation 1 use offset(0, 0)
for rotation 2 use offset(0, 0)
for rotation 3 use offset(0, 0)
```
## Pre-compiled firmware files
The firmware directory contains pre-compiled firmware for various devices with
the st7789 C driver and frozen python font files. See the README.md file in the
fonts folder for more information on the font files.
MicroPython MicroPython v1.20.0 compiled with ESP IDF v4.4.4 using CMake
Directory | File | Device
--------------------- | ------------ | ----------------------------------
GENERIC-7789 | firmware.bin | Generic ESP32 devices
GENERIC_SPIRAM-7789 | firmware.bin | Generic ESP32 devices with SPI Ram
GENERIC_C3 | firmware.bin | Generic ESP32-C3 devices
LOLIN_S2_MINI | firmware.bin | Wemos S2 mini
PYBV11 | firmware.dfu | Pyboard v1.1 (No PNG)
RP2 | firmware.uf2 | Raspberry Pi Pico RP2040
RP2W | firmware.uf2 | Raspberry Pi PicoW RP2040
T-DISPLAY | firmware.bin | LILYGO® TTGO T-Display
T-Watch-2020 | firmware.bin | LILYGO® T-Watch 2020
WIO_TERMINAL | firmware.bin | Seeed Wio Terminal
## Additional Modules
Module | Source
------------------ | -----------------------------------------------------------
axp202c | https://github.com/lewisxhe/AXP202X_Libraries
focaltouch | https://gitlab.com/mooond/t-watch2020-esp32-with-micropython
## Video Examples
Example | Video
--------------------- | -----------------------------------------------------------
PYBV11 hello.py | https://youtu.be/OtcERmad5ps
PYBV11 scroll.py | https://youtu.be/ro13rvaLKAc
T-DISPLAY fonts.py | https://youtu.be/2cnAhEucPD4
T-DISPLAY hello.py | https://youtu.be/z41Du4GDMSY
T-DISPLAY scroll.py | https://youtu.be/GQa-RzHLBak
T-DISPLAY roids.py | https://youtu.be/JV5fPactSPU
TWATCH-2020 draw.py | https://youtu.be/O_lDBnvH1Sw
TWATCH-2020 hello.py | https://youtu.be/Bwq39tuMoY4
TWATCH-2020 bitmap.py | https://youtu.be/DgYzgnAW2d8
TWATCH-2020 watch.py | https://youtu.be/NItKb6umMc4
This is a work in progress.
## Thanks go out to:
- https://github.com/devbis for the original driver this is based on.
- https://github.com/hklang10 for letting me know of the new mp_raise_ValueError().
- https://github.com/aleggon for finding the correct offsets for 240x240
displays and for discovering issues compiling STM32 ports.
-- Russ
## Overview
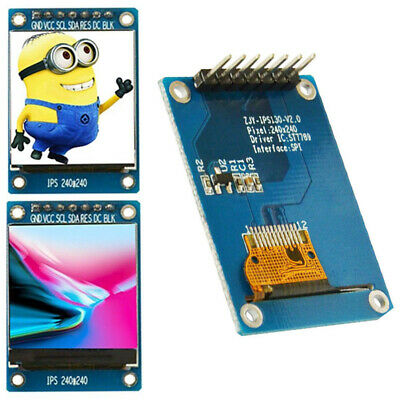
This is a driver for MicroPython to handle cheap displays based on the ST7789
chip. The driver is written in C. Firmware is provided for ESP32, ESP32 with SPIRAM,
pyboard1.1, and Raspberry Pi Pico devices.
# Setup MicroPython Build Environment in Ubuntu 20.04.2
See the MicroPython
[README.md](https://github.com/micropython/micropython/blob/master/ports/esp32/README.md#setting-up-esp-idf-and-the-build-environment)
if you run into any build issues not directly related to the st7789 driver. The
recommended MicroPython build instructions may have changed.
Update and upgrade Ubuntu using apt-get if you are using a new install of
Ubuntu or the Windows Subsystem for Linux.
```bash
sudo apt-get -y update
sudo apt-get -y upgrade
```
Use apt-get to install the required build tools.
```bash
sudo apt-get -y install build-essential libffi-dev git pkg-config cmake virtualenv python3-pip python3-virtualenv
```
### Install a compatible esp-idf SDK
The MicroPython README.md states: "The ESP-IDF changes quickly, and MicroPython
only supports certain versions. Currently, MicroPython supports v4.0.2, v4.1.1,
and v4.2 although other IDF v4 versions may also work." I have had good luck
using IDF v4.4
Clone the esp-idf SDK repo -- this usually takes several minutes.
```bash
git clone -b v4.4 --recursive https://github.com/espressif/esp-idf.git
cd esp-idf/
git pull
```
If you already have a copy of the IDF, you can checkout a version compatible
with MicroPython and update the submodules using:
```bash
$ cd esp-idf
$ git checkout v4.4
$ git submodule update --init --recursive
```
Install the esp-idf SDK.
```bash
./install.sh
```
Source the esp-idf export.sh script to set the required environment variables.
You must source the file and not run it using ./export.sh. You will need to
source this file before compiling MicroPython.
```bash
source export.sh
cd ..
```
Clone the MicroPython repo.
```bash
git clone https://github.com/micropython/micropython.git
```
Clone the st7789 driver repo.
```bash
git clone https://github.com/russhughes/st7789_mpy.git
```
Update the git submodules and compile the MicroPython cross-compiler
```bash
cd micropython/
git submodule update --init
cd mpy-cross/
make
cd ..
cd ports/esp32
```
Copy any .py files you want to include in the firmware as frozen python modules
to the modules subdirectory in ports/esp32. Be aware there is a limit to the
flash space available. You will know you have exceeded this limit if you
receive an error message saying the code won't fit in the partition or if your
firmware continuously reboots with an error.
For example:
```bash
cp ../../../st7789_mpy/fonts/bitmap/vga1_16x16.py modules
cp ../../../st7789_mpy/fonts/truetype/NotoSans_32.py modules
cp ../../../st7789_mpy/fonts/vector/scripts.py modules
```
Build the MicroPython firmware with the driver and frozen .py files in the
modules directory. If you did not add any .py files to the modules directory,
you can leave out the FROZEN_MANIFEST and FROZEN_MPY_DIR settings.
```bash
make USER_C_MODULES=../../../../st7789_mpy/st7789/micropython.cmake FROZEN_MANIFEST="" FROZEN_MPY_DIR=$UPYDIR/modules
```
Erase and flash the firmware to your device. Set PORT= to the ESP32's usb
serial port. I could not get the USB serial port to work under the Windows
Subsystem (WSL2) for Linux. If you have the same issue, you can copy the
firmware.bin file and use the Windows esptool.py to flash your device.
```bash
make USER_C_MODULES=../../../../st7789_mpy/st7789/micropython.cmake PORT=/dev/ttyUSB0 erase
make USER_C_MODULES=../../../../st7789_mpy/st7789/micropython.cmake PORT=/dev/ttyUSB0 deploy
```
The firmware.bin file will be in the build-GENERIC directory. To flash using
the python esptool.py utility. Use pip3 to install the esptool if it's not
already installed.
```bash
pip3 install esptool
```
Set PORT= to the ESP32's USB serial port
```bash
esptool.py --port COM3 erase_flash
esptool.py --chip esp32 --port COM3 write_flash -z 0x1000 firmware.bin
```
## CMake building instructions for MicroPython 1.14 and later
for ESP32:
$ cd micropython/ports/esp32
And then compile the module with specified USER_C_MODULES dir.
$ make USER_C_MODULES=../../../../st7789_mpy/st7789/micropython.cmake
for Raspberry Pi PICO:
$ cd micropython/ports/rp2
And then compile the module with specified USER_C_MODULES dir.
$ make USER_C_MODULES=../../../st7789_mpy/st7789/micropython.cmake
## Working examples
This module was tested on ESP32, STM32 based pyboard v1.1, and the Raspberry Pi
Pico. You have to provide an `SPI` object and the pin to use for the `dc' input
of the screen.
# ESP32 Example
# To use baudrates above 26.6MHz you must use my firmware or modify the micropython
# source code to increase the SPI baudrate limit by adding SPI_DEVICE_NO_DUMMY to the
# .flag member of the spi_device_interface_config_t struct in the machine_hw_spi_init_internal.c
# file. Not doing so will cause the ESP32 to crash if you use a baudrate that is too high.
import machine
import st7789
spi = machine.SPI(2, baudrate=40000000, polarity=1, sck=machine.Pin(18), mosi=machine.Pin(23))
display = st7789.ST7789(spi, 240, 240, reset=machine.Pin(4, machine.Pin.OUT), dc=machine.Pin(2, machine.Pin.OUT))
display.init()
## Methods
- `st7789.ST7789(spi, width, height, dc, reset, cs, backlight, rotations, rotation, custom_init, color_order, inversion, options, buffer_size)`
### Required positional arguments:
- `spi` spi device
- `width` display width
- `height` display height
### Required keyword arguments:
- `dc` sets the pin connected to the display data/command selection input.
This parameter is always required.
### Optional keyword arguments:
- `reset` sets the pin connected to the display's hardware reset input. If
the displays reset pin is tied high, the `reset` parameter is not
required.
- `cs` sets the pin connected to the displays chip select input. If the
display's CS pin is tied low, the display must be the only device
connected to the SPI port. The display will always be the selected
device, and the `cs` parameter is not required.
- `backlight` sets the pin connected to the display's backlight enable
input. The display's backlight input can often be left floating or
disconnected as the backlight on some displays is always powered on and
cannot be turned off.
- `rotations` sets the orientation table. The orientation table is a list
of tuples for each `rotation` used to set the MADCTL register, display width,
display height, start_x, and start_y values.
Default `rotations` are included for the following st7789 and st7735
display sizes:
Display | Default Orientation Tables
------- | --------------------------
240x320 | [(0x00, 240, 320, 0, 0), (0x60, 320, 240, 0, 0), (0xc0, 240, 320, 0, 0), (0xa0, 320, 240, 0, 0)]
170x320 | [(0x00, 170, 320, 35, 0), (0x60, 320, 170, 0, 35), (0xc0, 170, 320, 35, 0), (0xa0, 320, 170, 0, 35)]
240x240 | [(0x00, 240, 240, 0, 0), (0x60, 240, 240, 0, 0), (0xc0, 240, 240, 0, 80), (0xa0, 240, 240, 80, 0)]
135x240 | [(0x00, 135, 240, 52, 40), (0x60, 240, 135, 40, 53), (0xc0, 135, 240, 53, 40), (0xa0, 240, 135, 40, 52)]
128x160 | [(0x00, 128, 160, 0, 0), (0x60, 160, 128, 0, 0), (0xc0, 128, 160, 0, 0), (0xa0, 160, 128, 0, 0)]
128x128 | [(0x00, 128, 128, 2, 1), (0x60, 128, 128, 1, 2), (0xc0, 128, 128, 2, 3), (0xa0, 128, 128, 3, 2)]
other | [(0x00, width, height, 0, 0)]
You may define as many rotations as you wish.
- `rotation` sets the display rotation according to the orientation table.
The default orientation table defines four counter-clockwise rotations for 240x320, 240x240,
134x240, 128x160 and 128x128 displays with the LCD's ribbon cable at the bottom of the display.
The default rotation is Portrait (0 degrees).
Index | Rotation
----- | --------
0 | Portrait (0 degrees)
1 | Landscape (90 degrees)
2 | Reverse Portrait (180 degrees)
3 | Reverse Landscape (270 degrees)
- `custom_init` List of display configuration commands to send to the display during the display init().
The list contains tuples with a bytes object, optionally followed by a delay specified in ms. The first
byte of the bytes object contains the command to send optionally followed by data bytes.
See the `examples/configs/t_dongle_s3/tft_config.py` file or an example.
- `color_order` Sets the color order used by the driver (st7789.RGB or st7789.BGR)
- `inversion` Sets the display color inversion mode if True, clears the
display color inversion mode if false.
- `options` Sets driver option flags.
Option | Description
------------- | -----------
st7789.WRAP | pixels, lines, polygons, and Hershey text will wrap around the display both horizontally and vertically.
st7789.WRAP_H | pixels, lines, polygons, and Hershey text will wrap around the display horizontally.
st7789.WRAP_V | pixels, lines, polygons, and Hershey text will wrap around the display vertically.
- `buffer_size` If a buffer_size is not specified, a dynamically allocated
buffer is created and freed as needed. If a buffer_size is set, it must
be large enough to contain the largest bitmap, font character, and
decoded JPG image used (Rows * Columns * 2 bytes, 16bit colors in RGB565
notation). Dynamic allocation is slower and can cause heap fragmentation,
so garbage collection (GC) should be enabled.
- `inversion_mode(bool)` Sets the display color inversion mode if True, clears
the display color inversion mode if False.
- `madctl(value)` Returns the current value of the MADCTL register or sets the MADCTL register if a value is passed to the
method. The MADCTL register is used to set the display rotation and color order.
#### [MADCTL constants](#madctl-constants)
Constant Name | Value | Description
---------------- | ----- | ----------------------
st7789.MADCTL_MY | 0x80 | Page Address Order
st7789_MADCTL_MX | 0x40 | Column Address Order
st7789_MADCTL_MV | 0x20 | Page/Column Order
st7789_MADCTL_ML | 0x10 | Line Address Order
st7789_MADCTL_MH | 0x04 | Display Data Latch Order
st7789_RGB | 0x00 | RGB color order
st7789_BGR | 0x08 | BGR color order
#### [MADCTL examples](#madctl-examples)
Orientation | MADCTL Values for RGB color order, for BGR color order add 0x08 to the value.
----------- | ---------------------------------------------------------------------------------
 | 0x00
 | 0x80 ( MADCTL_MY )
 | 0x40 ( MADCTL_MX )
 | 0xC0 ( MADCTL_MX + MADCTL_MY )
 | 0x20 ( MADCTL_MV )
 | 0xA0 ( MADCTL_MV + MADCTL_MY )
 | 0x60 ( MADCTL_MV + MADCTL_MX )
 | 0xE0 ( MADCTL_MV + MADCTL_MX + MADCTL_MY )
- `init()`
Must be called to initialize the display.
- `on()`
Turn on the backlight pin if one was defined during init.
- `off()`
Turn off the backlight pin if one was defined during init.
- `sleep_mode(value)`
If value is True, cause the display to enter sleep mode, otherwise wake up if value is False. During sleep display content may not be preserved.
- `fill(color)`
Fill the display with the specified color.
- `pixel(x, y, color)`
Set the specified pixel to the given `color`.
- `line(x0, y0, x1, y1, color)`
Draws a single line with the provided `color` from (`x0`, `y0`) to
(`x1`, `y1`).
- `hline(x, y, length, color)`
Draws a single horizontal line with the provided `color` and `length`
in pixels. Along with `vline`, this is a fast version with fewer SPI calls.
- `vline(x, y, length, color)`
Draws a single horizontal line with the provided `color` and `length`
in pixels.
- `rect(x, y, width, height, color)`
Draws a rectangle from (`x`, `y`) with corresponding dimensions
- `fill_rect(x, y, width, height, color)`
Fill a rectangle starting from (`x`, `y`) coordinates
- `circle(x, y, r, color)`
Draws a circle with radius `r` centered at the (`x`, `y`) coordinates in the given
`color`.
- `fill_circle(x, y, r, color)`
Draws a filled circle with radius `r` centered at the (`x`, `y`) coordinates
in the given `color`.
- `blit_buffer(buffer, x, y, width, height)`
Copy bytes() or bytearray() content to the screen internal memory. Note:
every color requires 2 bytes in the array
- `text(font, s, x, y[, fg, bg])`
Write `s` (integer, string or bytes) to the display using the specified bitmap
`font` with the coordinates as the upper-left corner of the text. The optional
arguments `fg` and `bg` can set the foreground and background colors of the
text; otherwise the foreground color defaults to `WHITE`, and the background
color defaults to `BLACK`. See the `README.md` in the `fonts/bitmap` directory
for example fonts.
- `write(bitmap_font, s, x, y[, fg, bg, background_tuple, fill_flag])`
Write text to the display using the specified proportional or Monospace bitmap
font module with the coordinates as the upper-left corner of the text. The
foreground and background colors of the text can be set by the optional
arguments `fg` and `bg`, otherwise the foreground color defaults to `WHITE`
and the background color defaults to `BLACK`.
Transparency can be emulated by providing a `background_tuple` containing
(bitmap_buffer, width, height). This is the same format used by the jpg_decode
method. See examples/T-DISPLAY/clock/clock.py for an example.
See the `README.md` in the `truetype/fonts` directory for example fonts.
Returns the width of the string as printed in pixels. Accepts UTF8 encoded strings.
The `font2bitmap` utility creates compatible 1 bit per pixel bitmap modules
from Proportional or Monospaced True Type fonts. The character size,
foreground, background colors, and characters in the bitmap
module may be specified as parameters. Use the -h option for details. If you
specify a buffer_size during the display initialization, it must be large
enough to hold the widest character (HEIGHT * MAX_WIDTH * 2).
- `write_len(bitap_font, s)`
Returns the string's width in pixels if printed in the specified font.
- `draw(vector_font, s, x, y[, fg, scale])`
Draw text to the display using the specified Hershey vector font with the
coordinates as the lower-left corner of the text. The foreground color of the
text can be set by the optional argument `fg`. Otherwise the foreground color
defaults to `WHITE`. The size of the text can be scaled by specifying a
`scale` value. The `scale` value must be larger than 0 and can be a
floating-point or an integer value. The `scale` value defaults to 1.0. See
the README.md in the `vector/fonts` directory, for example fonts and the
utils directory for a font conversion program.
- `draw_len(vector_font, s[, scale])`
Returns the string's width in pixels if drawn with the specified font.
- `jpg(jpg, x, y [, method])`
Draw a `jpg` on the display with the given `x` and `y` coordinates as the
upper left corner of the image. `jpg` may be a string containing a filename
or a buffer containing the JPEG image data.
The memory required to decode and display a JPG can be considerable as a full-screen
320x240 JPG would require at least 3100 bytes for the working area + 320 * 240 * 2
bytes of ram to buffer the image. Jpg images that would require a buffer larger than
available memory can be drawn by passing `SLOW` for the `method`. The `SLOW` `method`
will draw the image one piece at a time using the Minimum Coded Unit (MCU, typically
a multiple of 8x8) of the image. The default method is `FAST`.
- `jpg_decode(jpg_filename [, x, y, width, height])`
Decode a jpg file and return it or a portion of it as a tuple composed of
(buffer, width, height). The buffer is a color565 blit_buffer compatible byte
array. The buffer will require width * height * 2 bytes of memory.
If the optional x, y, width, and height parameters are given, the buffer will
only contain the specified area of the image. See examples/T-DISPLAY/clock/clock.py
examples/T-DISPLAY/toasters_jpg/toasters_jpg.py for examples.
- `png(png_filename, x, y [, mask])`
Draw a PNG file on the display with upper left corner of the image at the given `x` and `y`
coordinates. The PNG will be clipped if it is not able to fit fully on the display. The
PNG will be drawn one line at a time. Since the driver does not contain a frame buffer,
transparency is not supported. Providing a `True` value for the `mask` parameter
will prevent pixels with a zero alpha channel value from being displayed. Drawing masked PNG's is
slower than non-masked as each visible line segment is drawn separately. For an example of using a
mask, see the alien.py program in the examples/png folder.
- `polygon_center(polygon)`
Return the center of the `polygon` as an (x, y) tuple. The `polygon` should
consist of a list of (x, y) tuples forming a closed convex polygon.
- `fill_polygon(polygon, x, y, color[, angle, center_x, center_y])`
Draw a filled `polygon` at the `x`, and `y` coordinates in the `color` given.
The polygon may be rotated `angle` radians about the `center_x` and
`center_y` point. The polygon should consist of a list of (x, y) tuples
forming a closed convex polygon.
See the TWATCH-2020 `watch.py` demo for an example.
- `polygon(polygon, x, y, color, angle, center_x, center_y)`
Draw a `polygon` at the `x`, and `y` coordinates in the `color` given. The
polygon may be rotated `angle` radians about the `center_x` and `center_y`
point. The polygon should consist of a list of (x, y) tuples forming a closed
convex polygon.
See the T-Display `roids.py` for an example.
- `bounding({status, as_rect})`
Bounding enables or disables tracking the display area that has been written
to. Initially, tracking is disabled; pass a True value to enable tracking and
False to disable it. Passing a True or False parameter will reset the current
bounding rectangle to (display_width, display_height, 0, 0).
Returns a four integer tuple containing (min_x, min_y, max_x, max_y)
indicating the area of the display that has been written to since the last
clearing.
If `as_rect` parameter is True, the returned tuple will contain (min_x,
min_y, width, height) values.
See the TWATCH-2020 `watch.py` demo for an example.
- `bitmap(bitmap, x , y [, index])`
Draw `bitmap` using the specified `x`, `y` coordinates as the upper-left
corner of the `bitmap`. The optional `index` parameter provides a method to
select from multiple bitmaps contained a `bitmap` module. The `index` is used
to calculate the offset to the beginning of the desired bitmap using the
modules HEIGHT, WIDTH, and BPP values.
The `imgtobitmap.py` utility creates compatible 1 to 8 bit per pixel bitmap
modules from image files using the Pillow Python Imaging Library.
The `monofont2bitmap.py` utility creates compatible 1 to 8 bit per pixel
bitmap modules from Monospaced True Type fonts. See the `inconsolata_16.py`,
`inconsolata_32.py` and `inconsolata_64.py` files in the `examples/lib`
folder for sample modules and the `mono_font.py` program for an example using
the generated modules.
The character sizes, bit per pixel, foreground, background colors, and the
characters to include in the bitmap module may be specified as parameters.
Use the -h option for details. Bits per pixel settings larger than one may be
used to create antialiased characters at the expense of memory use. If you
specify a buffer_size during the display initialization, it must be large
enough to hold the one character (HEIGHT * WIDTH * 2).
- `width()`
Returns the current logical width of the display. (ie a 135x240 display
rotated 90 degrees is 240 pixels wide)
- `height()`
Returns the current logical height of the display. (ie a 135x240 display
rotated 90 degrees is 135 pixels high)
- `rotation(r)`
Set the rotates the logical display in a counter-clockwise direction.
0-Portrait (0 degrees), 1-Landscape (90 degrees), 2-Inverse Portrait (180
degrees), 3-Inverse Landscape (270 degrees)
- `offset(x_start, y_start)` The memory in the ST7789 controller is configured
for a 240x320 display. When using a smaller display like a 240x240 or
135x240, an offset needs to be added to the x and y parameters so that the
pixels are written to the memory area corresponding to the visible display.
The offsets may need to be adjusted when rotating the display.
For example, the TTGO-TDisplay is 135x240 and uses the following offsets.
| Rotation | x_start | y_start |
|----------|---------|---------|
| 0 | 52 | 40 |
| 1 | 40 | 53 |
| 2 | 53 | 40 |
| 3 | 40 | 52 |
When the rotation method is called, the driver will adjust the offsets for a
135x240 or 240x240 display. Your display may require using different offset
values; if so, use the `offset` method after `rotation` to set the offset
values.
The values needed for a particular display may not be documented and may
require some experimentation to determine the correct values. One technique
is to draw a box the same size as the display and then make small changes to
the offsets until the display looks correct. See the `cfg_helper.py` program
in the examples folder for more information.
The module exposes predefined colors:
`BLACK`, `BLUE`, `RED`, `GREEN`, `CYAN`, `MAGENTA`, `YELLOW`, and `WHITE`
## Scrolling
The st7789 display controller contains a 240 by 320-pixel frame buffer used to
store the pixels for the display. For scrolling, the frame buffer consists of
three separate areas; The (`tfa`) top fixed area, the (`height`) scrolling
area, and the (`bfa`) bottom fixed area. The `tfa` is the upper portion of the
frame buffer in pixels not to scroll. The `height` is the center portion of the
frame buffer in pixels to scroll. The `bfa` is the lower portion of the frame
buffer in pixels not to scroll. These values control the ability to scroll the
entire or a part of the display.
For displays that are 320 pixels high, setting the `tfa` to 0, `height` to 320,
and `bfa` to 0 will allow scrolling of the entire display. You can set the
`tfa` and `bfa` to a non-zero value to scroll a portion of the display. `tfa` +
`height` + `bfa` = should equal 320, otherwise the scrolling mode is undefined.
Displays less than 320 pixels high, the `tfa`, `height`, and `bfa` will need to
be adjusted to compensate for the smaller LCD panel. The actual values will
vary depending on the configuration of the LCD panel. For example, scrolling
the entire 135x240 TTGO T-Display requires a `tfa` value of 40, `height` value
of 240, and `bfa` value of 40 (40+240+40=320) because the T-Display LCD shows
240 rows starting at the 40th row of the frame buffer, leaving the last 40 rows
of the frame buffer undisplayed.
Other displays like the Waveshare Pico LCD 1.3 inch 240x240 display require the
`tfa` set to 0, `height` set to 240, and `bfa` set to 80 (0+240+80=320) to
scroll the entire display. The Pico LCD 1.3 shows 240 rows starting at the 0th
row of the frame buffer, leaving the last 80 rows of the frame buffer
undisplayed.
The `vscsad` method sets the (VSSA) Vertical Scroll Start Address. The VSSA
sets the line in the frame buffer that will be the first line after the `tfa`.
The ST7789 datasheet warns:
The value of the vertical scrolling start address is absolute (with reference to the frame memory),
it must not enter the fixed area (defined by Vertical Scrolling Definition, otherwise undesirable
image will be displayed on the panel.
- `vscrdef(tfa, height, bfa)` Set the vertical scrolling parameters.
`tfa` is the top fixed area in pixels. The top fixed area is the upper
portion of the display frame buffer that will not be scrolled.
`height` is the total height in pixels of the area scrolled.
`bfa` is the bottom fixed area in pixels. The bottom fixed area is the lower
portion of the display frame buffer that will not be scrolled.
- `vscsad(vssa)` Set the vertical scroll address.
`vssa` is the vertical scroll start address in pixels. The vertical scroll
start address is the line in the frame buffer will be the first line shown
after the TFA.
## Helper functions
- `color565(r, g, b)`
Pack a color into 2-bytes rgb565 format
- `map_bitarray_to_rgb565(bitarray, buffer, width, color=WHITE, bg_color=BLACK)`
Convert a `bitarray` to the rgb565 color `buffer` suitable for blitting. Bit
1 in `bitarray` is a pixel with `color` and 0 - with `bg_color`.
| 0xE0 ( MADCTL_MV + MADCTL_MX + MADCTL_MY )
- `init()`
Must be called to initialize the display.
- `on()`
Turn on the backlight pin if one was defined during init.
- `off()`
Turn off the backlight pin if one was defined during init.
- `sleep_mode(value)`
If value is True, cause the display to enter sleep mode, otherwise wake up if value is False. During sleep display content may not be preserved.
- `fill(color)`
Fill the display with the specified color.
- `pixel(x, y, color)`
Set the specified pixel to the given `color`.
- `line(x0, y0, x1, y1, color)`
Draws a single line with the provided `color` from (`x0`, `y0`) to
(`x1`, `y1`).
- `hline(x, y, length, color)`
Draws a single horizontal line with the provided `color` and `length`
in pixels. Along with `vline`, this is a fast version with fewer SPI calls.
- `vline(x, y, length, color)`
Draws a single horizontal line with the provided `color` and `length`
in pixels.
- `rect(x, y, width, height, color)`
Draws a rectangle from (`x`, `y`) with corresponding dimensions
- `fill_rect(x, y, width, height, color)`
Fill a rectangle starting from (`x`, `y`) coordinates
- `circle(x, y, r, color)`
Draws a circle with radius `r` centered at the (`x`, `y`) coordinates in the given
`color`.
- `fill_circle(x, y, r, color)`
Draws a filled circle with radius `r` centered at the (`x`, `y`) coordinates
in the given `color`.
- `blit_buffer(buffer, x, y, width, height)`
Copy bytes() or bytearray() content to the screen internal memory. Note:
every color requires 2 bytes in the array
- `text(font, s, x, y[, fg, bg])`
Write `s` (integer, string or bytes) to the display using the specified bitmap
`font` with the coordinates as the upper-left corner of the text. The optional
arguments `fg` and `bg` can set the foreground and background colors of the
text; otherwise the foreground color defaults to `WHITE`, and the background
color defaults to `BLACK`. See the `README.md` in the `fonts/bitmap` directory
for example fonts.
- `write(bitmap_font, s, x, y[, fg, bg, background_tuple, fill_flag])`
Write text to the display using the specified proportional or Monospace bitmap
font module with the coordinates as the upper-left corner of the text. The
foreground and background colors of the text can be set by the optional
arguments `fg` and `bg`, otherwise the foreground color defaults to `WHITE`
and the background color defaults to `BLACK`.
Transparency can be emulated by providing a `background_tuple` containing
(bitmap_buffer, width, height). This is the same format used by the jpg_decode
method. See examples/T-DISPLAY/clock/clock.py for an example.
See the `README.md` in the `truetype/fonts` directory for example fonts.
Returns the width of the string as printed in pixels. Accepts UTF8 encoded strings.
The `font2bitmap` utility creates compatible 1 bit per pixel bitmap modules
from Proportional or Monospaced True Type fonts. The character size,
foreground, background colors, and characters in the bitmap
module may be specified as parameters. Use the -h option for details. If you
specify a buffer_size during the display initialization, it must be large
enough to hold the widest character (HEIGHT * MAX_WIDTH * 2).
- `write_len(bitap_font, s)`
Returns the string's width in pixels if printed in the specified font.
- `draw(vector_font, s, x, y[, fg, scale])`
Draw text to the display using the specified Hershey vector font with the
coordinates as the lower-left corner of the text. The foreground color of the
text can be set by the optional argument `fg`. Otherwise the foreground color
defaults to `WHITE`. The size of the text can be scaled by specifying a
`scale` value. The `scale` value must be larger than 0 and can be a
floating-point or an integer value. The `scale` value defaults to 1.0. See
the README.md in the `vector/fonts` directory, for example fonts and the
utils directory for a font conversion program.
- `draw_len(vector_font, s[, scale])`
Returns the string's width in pixels if drawn with the specified font.
- `jpg(jpg, x, y [, method])`
Draw a `jpg` on the display with the given `x` and `y` coordinates as the
upper left corner of the image. `jpg` may be a string containing a filename
or a buffer containing the JPEG image data.
The memory required to decode and display a JPG can be considerable as a full-screen
320x240 JPG would require at least 3100 bytes for the working area + 320 * 240 * 2
bytes of ram to buffer the image. Jpg images that would require a buffer larger than
available memory can be drawn by passing `SLOW` for the `method`. The `SLOW` `method`
will draw the image one piece at a time using the Minimum Coded Unit (MCU, typically
a multiple of 8x8) of the image. The default method is `FAST`.
- `jpg_decode(jpg_filename [, x, y, width, height])`
Decode a jpg file and return it or a portion of it as a tuple composed of
(buffer, width, height). The buffer is a color565 blit_buffer compatible byte
array. The buffer will require width * height * 2 bytes of memory.
If the optional x, y, width, and height parameters are given, the buffer will
only contain the specified area of the image. See examples/T-DISPLAY/clock/clock.py
examples/T-DISPLAY/toasters_jpg/toasters_jpg.py for examples.
- `png(png_filename, x, y [, mask])`
Draw a PNG file on the display with upper left corner of the image at the given `x` and `y`
coordinates. The PNG will be clipped if it is not able to fit fully on the display. The
PNG will be drawn one line at a time. Since the driver does not contain a frame buffer,
transparency is not supported. Providing a `True` value for the `mask` parameter
will prevent pixels with a zero alpha channel value from being displayed. Drawing masked PNG's is
slower than non-masked as each visible line segment is drawn separately. For an example of using a
mask, see the alien.py program in the examples/png folder.
- `polygon_center(polygon)`
Return the center of the `polygon` as an (x, y) tuple. The `polygon` should
consist of a list of (x, y) tuples forming a closed convex polygon.
- `fill_polygon(polygon, x, y, color[, angle, center_x, center_y])`
Draw a filled `polygon` at the `x`, and `y` coordinates in the `color` given.
The polygon may be rotated `angle` radians about the `center_x` and
`center_y` point. The polygon should consist of a list of (x, y) tuples
forming a closed convex polygon.
See the TWATCH-2020 `watch.py` demo for an example.
- `polygon(polygon, x, y, color, angle, center_x, center_y)`
Draw a `polygon` at the `x`, and `y` coordinates in the `color` given. The
polygon may be rotated `angle` radians about the `center_x` and `center_y`
point. The polygon should consist of a list of (x, y) tuples forming a closed
convex polygon.
See the T-Display `roids.py` for an example.
- `bounding({status, as_rect})`
Bounding enables or disables tracking the display area that has been written
to. Initially, tracking is disabled; pass a True value to enable tracking and
False to disable it. Passing a True or False parameter will reset the current
bounding rectangle to (display_width, display_height, 0, 0).
Returns a four integer tuple containing (min_x, min_y, max_x, max_y)
indicating the area of the display that has been written to since the last
clearing.
If `as_rect` parameter is True, the returned tuple will contain (min_x,
min_y, width, height) values.
See the TWATCH-2020 `watch.py` demo for an example.
- `bitmap(bitmap, x , y [, index])`
Draw `bitmap` using the specified `x`, `y` coordinates as the upper-left
corner of the `bitmap`. The optional `index` parameter provides a method to
select from multiple bitmaps contained a `bitmap` module. The `index` is used
to calculate the offset to the beginning of the desired bitmap using the
modules HEIGHT, WIDTH, and BPP values.
The `imgtobitmap.py` utility creates compatible 1 to 8 bit per pixel bitmap
modules from image files using the Pillow Python Imaging Library.
The `monofont2bitmap.py` utility creates compatible 1 to 8 bit per pixel
bitmap modules from Monospaced True Type fonts. See the `inconsolata_16.py`,
`inconsolata_32.py` and `inconsolata_64.py` files in the `examples/lib`
folder for sample modules and the `mono_font.py` program for an example using
the generated modules.
The character sizes, bit per pixel, foreground, background colors, and the
characters to include in the bitmap module may be specified as parameters.
Use the -h option for details. Bits per pixel settings larger than one may be
used to create antialiased characters at the expense of memory use. If you
specify a buffer_size during the display initialization, it must be large
enough to hold the one character (HEIGHT * WIDTH * 2).
- `width()`
Returns the current logical width of the display. (ie a 135x240 display
rotated 90 degrees is 240 pixels wide)
- `height()`
Returns the current logical height of the display. (ie a 135x240 display
rotated 90 degrees is 135 pixels high)
- `rotation(r)`
Set the rotates the logical display in a counter-clockwise direction.
0-Portrait (0 degrees), 1-Landscape (90 degrees), 2-Inverse Portrait (180
degrees), 3-Inverse Landscape (270 degrees)
- `offset(x_start, y_start)` The memory in the ST7789 controller is configured
for a 240x320 display. When using a smaller display like a 240x240 or
135x240, an offset needs to be added to the x and y parameters so that the
pixels are written to the memory area corresponding to the visible display.
The offsets may need to be adjusted when rotating the display.
For example, the TTGO-TDisplay is 135x240 and uses the following offsets.
| Rotation | x_start | y_start |
|----------|---------|---------|
| 0 | 52 | 40 |
| 1 | 40 | 53 |
| 2 | 53 | 40 |
| 3 | 40 | 52 |
When the rotation method is called, the driver will adjust the offsets for a
135x240 or 240x240 display. Your display may require using different offset
values; if so, use the `offset` method after `rotation` to set the offset
values.
The values needed for a particular display may not be documented and may
require some experimentation to determine the correct values. One technique
is to draw a box the same size as the display and then make small changes to
the offsets until the display looks correct. See the `cfg_helper.py` program
in the examples folder for more information.
The module exposes predefined colors:
`BLACK`, `BLUE`, `RED`, `GREEN`, `CYAN`, `MAGENTA`, `YELLOW`, and `WHITE`
## Scrolling
The st7789 display controller contains a 240 by 320-pixel frame buffer used to
store the pixels for the display. For scrolling, the frame buffer consists of
three separate areas; The (`tfa`) top fixed area, the (`height`) scrolling
area, and the (`bfa`) bottom fixed area. The `tfa` is the upper portion of the
frame buffer in pixels not to scroll. The `height` is the center portion of the
frame buffer in pixels to scroll. The `bfa` is the lower portion of the frame
buffer in pixels not to scroll. These values control the ability to scroll the
entire or a part of the display.
For displays that are 320 pixels high, setting the `tfa` to 0, `height` to 320,
and `bfa` to 0 will allow scrolling of the entire display. You can set the
`tfa` and `bfa` to a non-zero value to scroll a portion of the display. `tfa` +
`height` + `bfa` = should equal 320, otherwise the scrolling mode is undefined.
Displays less than 320 pixels high, the `tfa`, `height`, and `bfa` will need to
be adjusted to compensate for the smaller LCD panel. The actual values will
vary depending on the configuration of the LCD panel. For example, scrolling
the entire 135x240 TTGO T-Display requires a `tfa` value of 40, `height` value
of 240, and `bfa` value of 40 (40+240+40=320) because the T-Display LCD shows
240 rows starting at the 40th row of the frame buffer, leaving the last 40 rows
of the frame buffer undisplayed.
Other displays like the Waveshare Pico LCD 1.3 inch 240x240 display require the
`tfa` set to 0, `height` set to 240, and `bfa` set to 80 (0+240+80=320) to
scroll the entire display. The Pico LCD 1.3 shows 240 rows starting at the 0th
row of the frame buffer, leaving the last 80 rows of the frame buffer
undisplayed.
The `vscsad` method sets the (VSSA) Vertical Scroll Start Address. The VSSA
sets the line in the frame buffer that will be the first line after the `tfa`.
The ST7789 datasheet warns:
The value of the vertical scrolling start address is absolute (with reference to the frame memory),
it must not enter the fixed area (defined by Vertical Scrolling Definition, otherwise undesirable
image will be displayed on the panel.
- `vscrdef(tfa, height, bfa)` Set the vertical scrolling parameters.
`tfa` is the top fixed area in pixels. The top fixed area is the upper
portion of the display frame buffer that will not be scrolled.
`height` is the total height in pixels of the area scrolled.
`bfa` is the bottom fixed area in pixels. The bottom fixed area is the lower
portion of the display frame buffer that will not be scrolled.
- `vscsad(vssa)` Set the vertical scroll address.
`vssa` is the vertical scroll start address in pixels. The vertical scroll
start address is the line in the frame buffer will be the first line shown
after the TFA.
## Helper functions
- `color565(r, g, b)`
Pack a color into 2-bytes rgb565 format
- `map_bitarray_to_rgb565(bitarray, buffer, width, color=WHITE, bg_color=BLACK)`
Convert a `bitarray` to the rgb565 color `buffer` suitable for blitting. Bit
1 in `bitarray` is a pixel with `color` and 0 - with `bg_color`.